
Last Updated: November 4, 2026
Quick Summary
To maximize wine display space in tight areas, measure the narrowest width, height and depth first, then use wall-mounted or modular racks that are one bottle deep and take zero floor space. Plan capacity as rows and columns on your usable wall area, and add roughly 30 percent headroom for growth.
- Measure width, height and depth at the narrowest point, not the widest.
- Wall-mounted racks take zero floor space and turn an empty wall into bottle storage.
- Narrow space storage comes down to depth: a 12 cm profile keeps corridors clear.
- Most tight-area projects lose 10 to 20 percent of nominal wall to interruptions.
- Add roughly 30 percent growth headroom and mark the growth zone on your plan.
Table of Contents
- Start by Measuring Your Tight Area Before You Buy
- Wine Storage Ideas for Small Spaces That Actually Work
- Narrow Space Wine Storage: Racks That Fit Tight Walls
- Small Kitchen Wine Rack Options for Compact Layouts
- Why Modular Wine Storage Beats Fixed Racks
- Plan Bottle Capacity and Layout Before Installation
- Safety, Load Limits, and Installation Checks
- Shop Modular Wine Display Systems for Your Space
- Frequently Asked Questions
Start by Measuring Your Tight Area Before You Buy
Planning a wine display space before measuring can lead to a rack that does not fit. A wall that looks wide enough in a photo may lose space to skirting boards, door swings, or a radiator.
Before you spend anything, do three things:
- Measure width, height, and depth at the narrowest point, not the widest.
- Check what blocks the wall: sockets, switches, pipes, radiators, door handles.
- Note the walkway you need to keep clear, then subtract it from your usable depth.
Write the numbers down; every decision after this depends on them. For a structured walkthrough of the full planning process, our guide on how to plan wine cellar layout takes you through it step by step.
Wine Storage Ideas for Small Spaces That Actually Work
Small-space wine storage works best when you stop thinking about floor area and start thinking about walls.
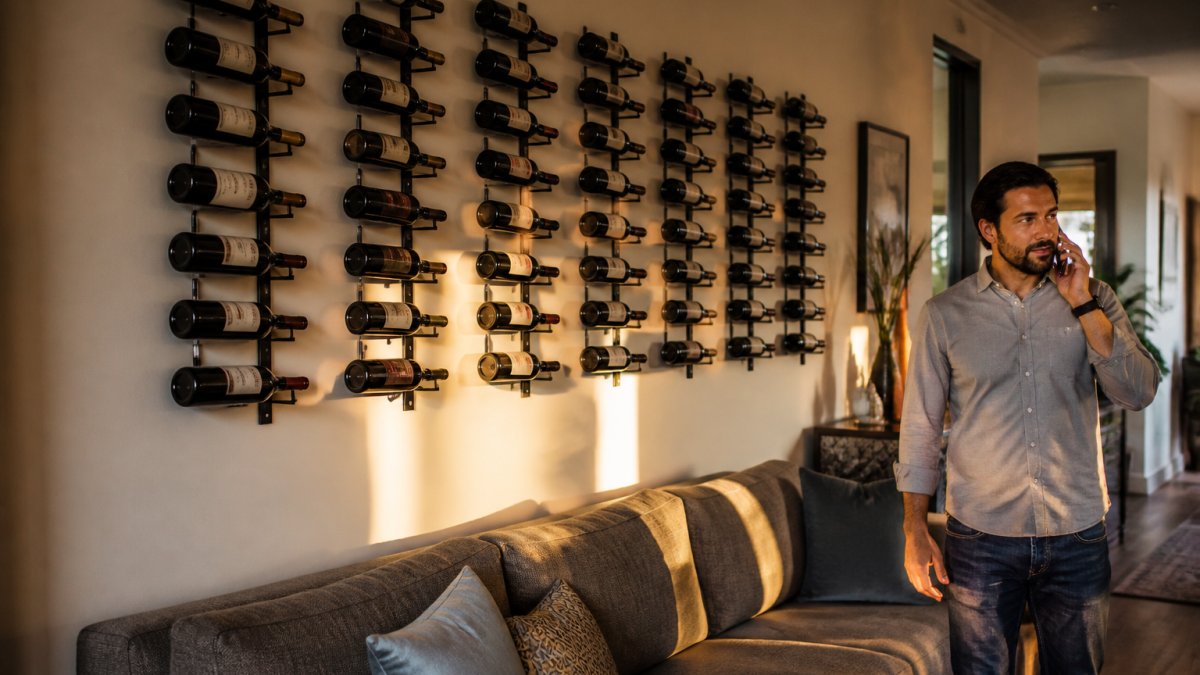 Matte black modular wine rack with label-forward bottles on a living room wall above a modern sofa
The wine storage ideas for small spaces that hold up in practice share one trait: they use height and depth together. A shallow rack on a tall wall beats a deep cabinet every time.
Use Vertical Space With Wall-Mounted Racks
Wall-mounted racks are the single most effective answer to a tight area. They take zero floor space and turn an empty wall into bottle storage.
The Winerack Wall Serie W11 is a compact wall rack that holds three bottles label-forward and is one bottle deep, and it is supported by high-quality steel racks.
If floor space is short, going up on the wall is the practical option.
Turn Awkward Alcoves Into Feature Walls
An alcove is not a problem. It is a ready-made wine wall with three sides already built for you.
Work with the shape rather than fight it. For triangular or sloped spaces, our guide on designing wine storage under stairs shows how stepped layouts follow the angle of the structure.
Done well, an alcove becomes the focal point of the room; done badly, a dust trap. The difference is planning the layout before you order.
Narrow Space Wine Storage: Racks That Fit Tight Walls
Narrow space wine storage comes down to one number: depth. A rack that sits 30 centimetres off the wall eats a corridor; one that sits 12 centimetres deep does not.
Here is how the main options compare for tight walls:
| Option | Depth | Floor Space Used | Best For |
|---|---|---|---|
| Wall-mounted rack | Shallow, one bottle deep | None | Narrow walls, corridors |
| Floor-to-ceiling rack | Shallow | Small footprint | Tall, slim walls |
| Modular wall system | Shallow, scalable | None | Growing collections |
| Freestanding cabinet | Deep | Large | Rooms with spare floor area |
For a wall under a metre wide, a wall-mounted system wins almost every time. It keeps the floor clear and puts the display at eye level, where you actually see the labels.
Small Kitchen Wine Rack Options for Compact Layouts
A small kitchen wine rack should store bottles properly and stay clear of work surfaces.
Watch out: heat is the enemy here. A rack above a hob or beside an oven will cook your wine. Keep bottles away from heat sources and direct sun.
For compact kitchens, our collection of minimalist wine display ideas for small kitchens covers layouts that keep the room feeling open.
Why Modular Wine Storage Beats Fixed Racks
Modular wine storage solves the problem fixed racks create: outgrowing them. A fixed rack has a set capacity. The day your collection passes it, you start again.
Modular systems scale with you: add racks to the same wall in the same finish and the display grows without a redesign.
Fixed racks suit a permanent, known collection. Modular racks suit everyone whose collection is still growing. Most collectors are in the second group.
Plan Bottle Capacity and Layout Before Installation
Capacity planning is where tight-area projects succeed or fail, and it is almost always done too loosely. "How many bottles fit?" is the wrong first question. The right one is: how many bottles fit and stay reachable, in the bottle shapes you actually own, on the wall you actually have?
Work it out on paper before you order anything.
Matte Black Modular Wine Display Over the Couch →
Step 1: Measure usable wall area, not total wall area
Take your narrowest width and your clear height from the top of the skirting to the ceiling (or the underside of any shelf or cornice). Subtract anything that interrupts the wall: sockets, switches, radiators, pipe boxing, door swings. The result is your usable rectangle. Most tight-area projects lose 10 to 20 percent of the nominal wall to these interruptions, so plan against the usable figure.
Step 2: Convert wall area into rows and columns
A wall-mounted, label-forward system is laid out as a grid: bottles per row across the width, rows stacked up the height. Divide usable width by the rack's on-centre spacing for bottles per row, then usable height by row spacing for the number of rows. Multiply for a realistic maximum, then subtract one row and one column as an access margin, which is what lets you reach edge bottles without knocking neighbours.
Step 3: Check bottle-size compatibility before you commit
Standard 750 ml bottles are not one size. Burgundy and Champagne bottles are wider at the base than Bordeaux shapes, and magnums need wider cradles and more vertical clearance. A rack rated for standard bottles may not accept a Champagne bottle label-forward without the collar fouling the neighbour. List the formats you actually store, note the widest base diameter and tallest overall length, and confirm the rack's stated compatibility against those figures.
Step 4: Decide display orientation and its capacity cost
Label-forward display turns the collection into a feature but typically uses more wall width per bottle than cork-forward storage, because each bottle occupies a full cradle face. Cork-forward or neck-out layouts pack more bottles into the same wall but hide the labels. In a tight area, use label-forward for the feature wall you look at every day and denser orientation for the secondary wall behind a door or in a corridor.
Step 5: Confirm access, not just fit
Walk the layout with your hand. Can you reach every bottle without moving three others? In a grid, the top row and far column are the ones that fail this test, and a bottle that needs a step stool becomes storage you stop using. Cap the top row at a comfortable reach and keep the densest section at eye level where you actually browse.
Step 6: Add growth headroom
Count your current bottles, then add roughly 30 percent for growth. A modular system lets you add a section later, but only if you left the wall space and fixing points for it. Mark the growth zone on your plan now.
Confirm exact capacity figures against the specific rack's published dimensions before you order.
Watch out: quoted capacity figures are usually maximum theoretical counts, so the usable number is typically lower.
Safety, Load Limits, and Installation Checks
A wall full of wine is heavier than most people expect, and in a tight area the rack is often close to where people walk, sit, or work. Load and fixing checks matter for keeping a display securely mounted.
Estimate the filled weight first
Bottle weight adds up quickly, so add the rack's own weight to the total load your wall must carry. Large formats scale up sharply: a magnum is double the volume, and larger formats more again. Add the rack's own weight to the bottle total to get the load your wall must carry, then add a safety margin rather than planning to the exact figure.
Match the fixing to the wall type
This is where most failures originate. Plasterboard on its own will not carry a loaded rack; the fixings must reach the studs or the masonry behind. Identify what your wall is made of before you drill: solid masonry, timber stud with plasterboard, or drywall on metal studs each need different fixings and different spacing.
Spread the load and check ratings
A rack held by two fixings at the top corners concentrates the entire load on two points. Spread the fixing across as many points as the rack provides, and check the stated load rating of each fixing against the share of the total weight it will carry, with margin. A common pattern is to over-specify the fixings rather than match them exactly, because the cost difference is small and the consequence of under-specifying is not.
Plan for tip-over and seismic risk
Wall-mounted racks are inherently more stable than tall freestanding units, but any floor-standing or floor-to-ceiling system in a tight area needs to be restrained against tipping, especially where children, pets, or heavy foot traffic pass close by. In seismic regions, check local requirements for restraining tall units. If you are unsure whether your area has seismic requirements, check local building guidance before installation.
Keep the walkway clear
A rack that protrudes into a corridor is a shoulder-height hazard. Check the finished depth of the loaded rack against the walkway you measured at the start, and keep the deepest part of the display away from door swings and pinch points. In a tight room, the difference between a 12 cm and a 30 cm profile is the difference between a clear path and a constant knock.
Know when to bring in a professional
If the wall type is uncertain, if the load is large, if the rack is floor-to-ceiling, or if the location is seismic, have a qualified installer assess the wall and specify the fixings.
Watch out: a rack that feels solid when empty can still be under-fixed for its filled weight. Test the fixing plan against the loaded weight, not the empty rack, before you trust it.
Shop Modular Wine Display Systems for Your Space
Modular systems can suit a tight area and can be built up over time.
The Matte Black Modular Wine Display Over the Couch holds 15 bottles in a label-forward layout. The Matte Black Modular Wine Display Under The Stairs 1-deep holds 30 bottles in a 1-bottle-deep configuration. The Winerack Vino Pins VP1 - Depth 1 bottle is a 1-bottle-deep option.
Frequently Asked Questions
How can I display wine bottles in a small space?
Use vertical wall space instead of floor space. A wall-mounted rack that holds bottles label-forward keeps the footprint shallow, often just one bottle deep. Measure the wall height and width first, then choose a modular kit that fits those dimensions. For very tight spots, the Matte Black Modular Wine Display Over the Couch is a 15-bottle kit.
How do I choose a wine rack for a narrow area?
Check three things: depth, width, and bottle orientation. A one-bottle-deep rack keeps walkways clear in narrow space wine storage. Confirm the rack width fits between obstructions like door frames or radiators. Label-forward display lets you read labels without pulling bottles out, which matters when space is tight.
Can a wall-mounted wine display save space?
Yes. Wall-mounted racks move your collection off the floor, so you keep floor space for furniture and traffic. A wine display planned on the wall can keep bottles off the floor. The key is fixing the rack securely into a suitable wall and checking the load rating before loading it with heavy bottles.
How should I measure a space before planning a wine display?
Measure height, width, and depth at the tightest point, not the widest. Note door swings, plug sockets, and skirting boards. For an under-stairs area, measure the slope at several points because the height changes along the run. Write down bottle capacity per rack section and multiply by the number of sections that fit. This prevents buying a system that looks right in photos but does not fit once installed.
Your tight area is not a limitation. It is a design brief. Measure it, plan the layout, choose a shallow modular system, and check the fixings before you load it. Get started with VintageView and turn that awkward wall into a wine display you are proud to show.
