
Table of Contents
- Can You Move Modular Wine Racks Later? The Short Answer
- When You Should and Shouldn't Move a Modular Wine Rack Intact
- Preparing Your Wine Collection and Rack for Transport
- Step-by-Step Disassembly of Modular Wine Rack Installation
- Safely Packing and Transporting Rack Components
- Wine Rack Layout Planning for Your New Space
- Reassembling and Reconfigurable Wine Storage in the New Location
- Common Mistakes to Avoid When Relocating Your Rack
- Frequently Asked Questions
Last Updated: October 20, 2026
Can You Move Modular Wine Racks Later? The Short Answer
Yes, you can move modular wine racks later. Whether you can relocate yours depends on the system type and how it was installed. At Winerack Solutions, we offer premium, modular wine storage systems designed to transform any space into a stunning, high-performance wine display. Our scalable solutions blend functionality with modern design to perfectly fit your unique collection and interior style.
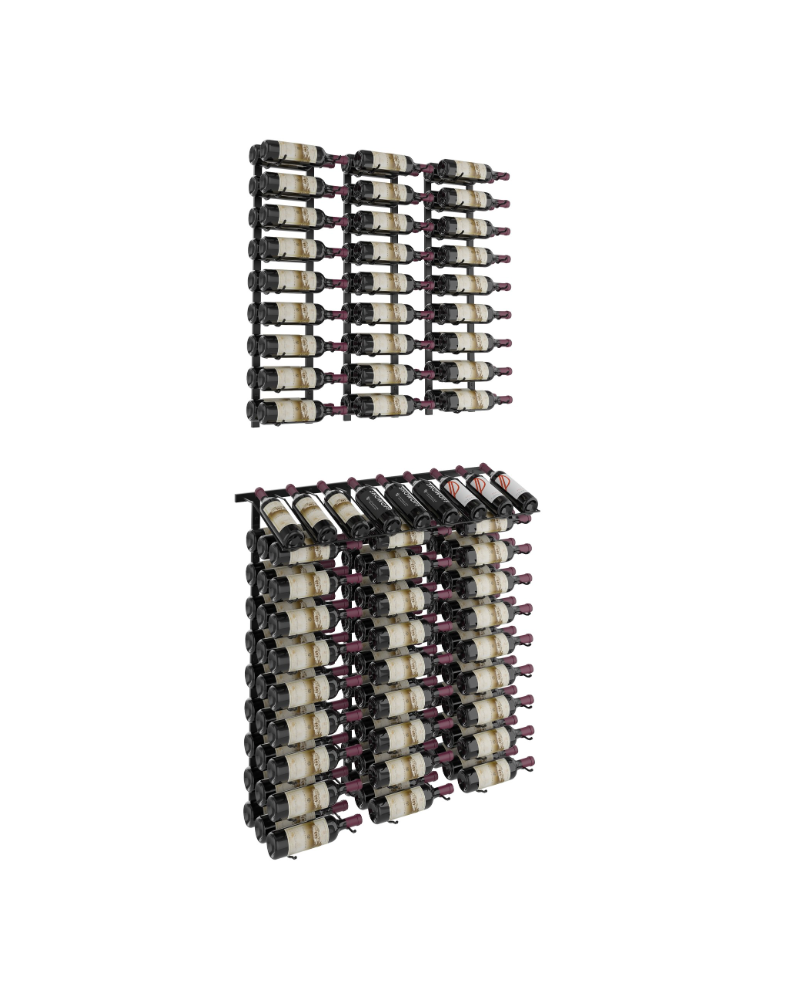 Matte Black Modular Wine Rack Display Kit (7-Piece Set)
The real question is whether to move it intact or disassemble and reassemble. Wall-mounted racks require careful removal; freestanding or floor-to-ceiling systems move more easily. That difference changes the work involved, the tools you need, and how safe your bottles stay during the move.
This guide covers assessing your rack type, preparing your collection, safe disassembly, packing, and reassembly in your new space, whether you're expanding a wine room, redesigning a kitchen, or moving home.
When You Should and Shouldn't Move a Modular Wine Rack Intact
Moving your rack intact means relocating it fully assembled as one unit, best for freestanding racks and floor-to-ceiling systems that don't rely on wall anchoring.
Move your rack intact if:
- Your system is freestanding or uses a floor-to-ceiling post configuration
- The new space has the same dimensions and wall type as your current location
- You're moving the rack a short distance within your home
- Your collection is smaller and the weight is manageable
- You want to minimize the time spent on reassembly
Disassemble and reassemble instead if:
- Your rack is wall-mounted with fasteners and anchoring hardware
- The new space has different wall material, layout, or dimensions
- You're moving to a different home or long distance
- You want to reconfigure the layout to fit a new space better
- You're concerned about stability after multiple relocations
- Your collection has grown and you need a different footprint
Wall-mounted systems like our Matte Black Modular Wine Rack Display Kit are designed to come apart. Connectors, fasteners, and shelves separate cleanly, making relocation safer for both bottles and walls and sparing you from hauling a heavy, fragile assembly through doorways.
Floor-to-ceiling racks like our Matte Black Modular Floor-to-Ceiling Wine Rack Kit can sometimes move intact if the new space has the same height, but disassembly still helps over longer distances or tight spaces.
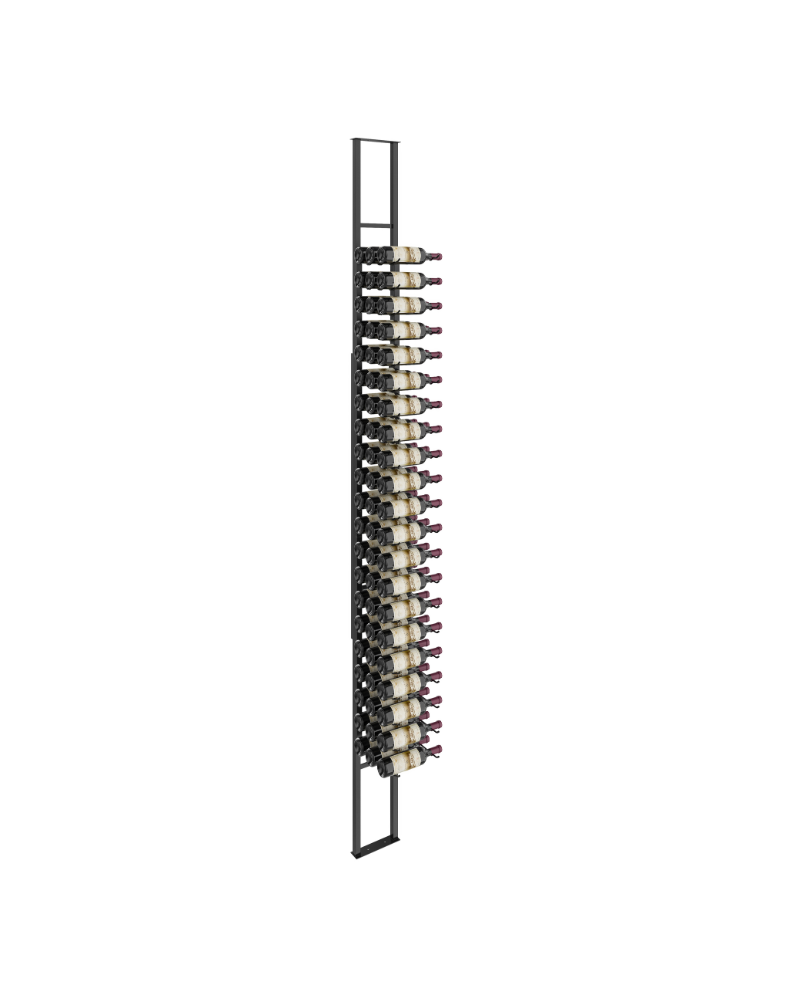 Matte Black Modular Floor-to-Ceiling Wine Rack Kit
Preparing Your Wine Collection and Rack for Transport
Before touching a fastener, protect and organize your bottles.
Step 1: Inventory and photograph your collection. List how many bottles you own and note any valuable ones. Photograph your rack from the front, sides, and top, this record helps you recreate the layout and documents condition if anything shifts.
Step 2: Remove bottles carefully. Work from the top down, placing each bottle in a compartmented box with dividers, one per cell, to stop bottles rolling or clinking. Stack boxes flat in a climate-controlled space away from direct sunlight.
Step 3: Stabilize your collection temperature. Wine is sensitive to temperature swings. Keep bottles in a cool, stable environment for at least 24 hours before packing and avoid shifts of more than 10 degrees, which can disturb sediment in aged wines and affect cork integrity.
Step 4: Label and organize components. Use painter's tape and a marker to label each connector, fastener set, and shelf with its section, such as "Wall Section 1 - Top." This cuts reassembly time in half and prevents confusion.
Step 5: Gather your hardware. Collect all fasteners, anchors, and connectors into labeled bags or compartmented boxes organized by section, fasteners are easy to lose and costly to replace.
Step-by-Step Disassembly of Modular Wine Rack Installation
Disassembly is straightforward in a logical order: top to bottom, center outward.
What you'll need:
- Screwdriver (Phillips and flathead)
- Wrench or socket set for bolts
- Painter's tape and marker
- Small containers for fasteners
- Bubble wrap or moving blankets
- Camera or smartphone for documentation
The disassembly process:
Step 1: Remove shelves from the top down. Most modular racks use simple connectors that slide or bolt together. Loosen fasteners gently and never force a stuck connector.
Step 3: Remove wall anchoring hardware. Wrap anchors, brackets, and fasteners in bubble wrap, label them clearly, and keep them separate from the rack components.
Step 4: Wrap and protect each component. Wrap shelves, supports, and connectors in bubble wrap or moving blankets, paying special attention to finished surfaces, matte black finishes scratch easily.
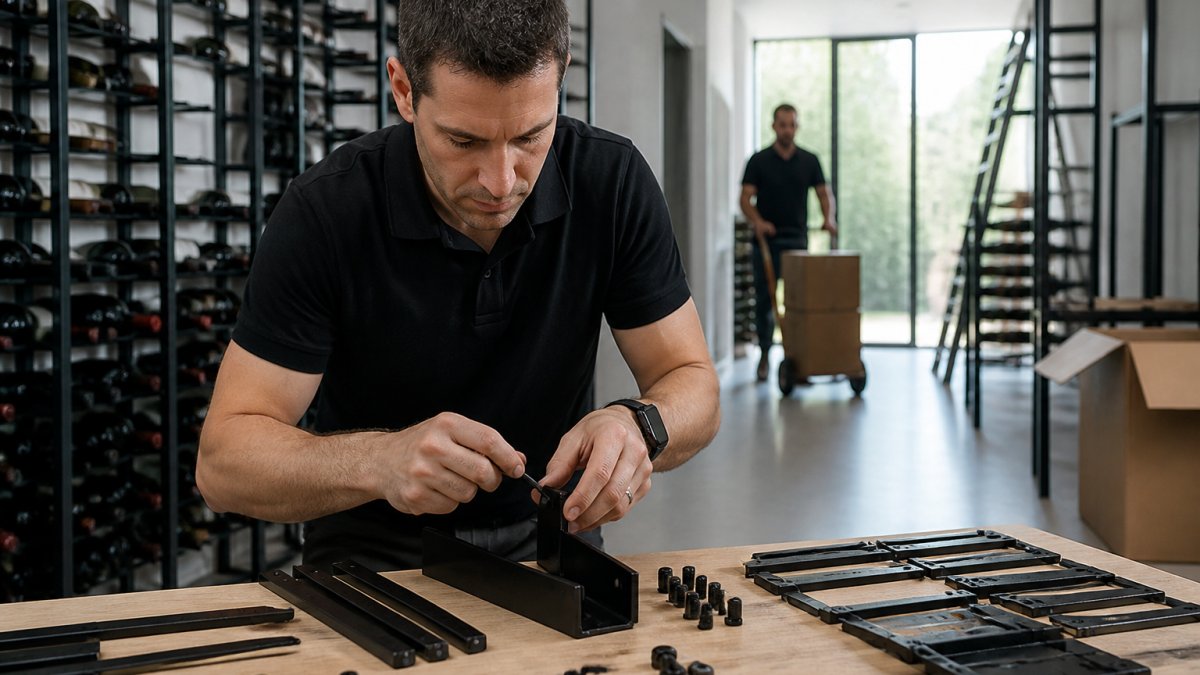 Close-up of hands carefully disconnecting modular wine rack connectors and fasteners, with labeled components organized on a clean work surface
Step 5: Pack components by section. Group pieces from the same wall section into a separate labeled box so reassembly stays logical and parts don't get mixed.
Step 6: Document the disassembly. Photograph the empty wall, removed anchors, and packed components as a reassembly guide and proof of condition for insurance.
Safely Packing and Transporting Rack Components
Your rack components are durable, but transport requires care, bottles are fragile and rack pieces can shift.
Packing the bottles:
Use compartmented boxes with dividers, one bottle per cell, filling empty cells with packing paper. Seal with strong tape, mark "FRAGILE" and "THIS SIDE UP" on all four sides, and stack no more than three high with heavier boxes on the bottom.
Packing the rack components:
Wrap each piece individually in bubble wrap, using moving blankets for shelves and larger components. Put heavier pieces at the bottom of boxes, lighter items on top, and fill gaps with packing paper to prevent shifting.
Transport considerations:
- Keep the vehicle temperature stable and avoid leaving boxes in a hot car.
- Secure boxes with moving straps so they don't slide during acceleration or braking.
- For long-distance moves, consider climate-controlled transport to protect your collection from temperature swings.
For longer distances or high-value collections:
Matte Black Modular Wine Rack Display Kit (7-Piece Set) →
For rare or expensive bottles, professional movers experienced in wine transport add peace of mind with climate-controlled vehicles. For standard collections and short relocations, careful DIY packing works well.
Wine Rack Layout Planning for Your New Space
Before reassembling, plan your new layout, your chance to optimize the space and improve on your current configuration.
Measure your new space carefully. Note wall dimensions, ceiling height, outlets, switches, and architectural features. Check wall material, drywall, brick, or plaster each require different anchoring, which may change your reassembly strategy.
Consider your collection size. A Matte Black Modular Wine Rack Display Kit holds 144 bottles, while the Deluxe version accommodates 288 bottles plus magnums. If you've outgrown your system, expand with additional modules now.
Plan for visual impact. Modular racks are design features, not just storage. A corner wine wall creates a focal point in a dining area, a floor-to-ceiling display like our Matte Black Modular Floor-to-Ceiling Wine Rack Kit turns a narrow wall into a dramatic feature, and horizontal layouts suit kitchens with limited wall height.
Account for access and viewing. Put the most valuable or frequently accessed bottles at chest height, not at the top or bottom of your display.
Test the layout on paper first. Sketch the space, mark where each section goes along with outlets, switches, and obstacles, this prevents mistakes and saves time during reassembly.
| Layout Type | Best For | Space Needed | Bottle Capacity |
|---|---|---|---|
| Wall-mounted horizontal | Kitchens, dining areas | 4-8 feet wide, 2-4 feet tall | 60-144 bottles |
| Vertical wall display | Living rooms, dens | 2-3 feet wide, 6-8 feet tall | 100-200+ bottles |
| Floor-to-ceiling post | Open concept spaces | 2-3 feet square footprint | 63-100+ bottles |
| Corner display | Unused corners | 3-4 feet per side | 80-150 bottles |
Reassembling and Reconfigurable Wine Storage in the New Location
Reassembly reverses disassembly but requires patience and precision.
Step 1: Prepare the wall. On the same wall, clean it and patch old anchor holes. On a new wall, locate studs with a stud finder and plan anchor placement, marking points lightly with a pencil.
Step 3: Install vertical supports first. Attach the main vertical frame pieces to the wall anchors and use a level, even a slight tilt affects how shelves align and how your collection sits.
Step 4: Attach shelves and connectors. With supports secure, attach shelves bottom to top so upper shelves don't get in your way. Tighten firmly but don't over-tighten, which can strip threads or crack connectors.
Step 5: Test stability before loading bottles. Push gently on shelves and frame, there should be no flex, wobble, or movement. If there is, re-tighten fasteners or check placement.
Step 6: Reload your collection. Once stable, place bottles back starting from the lower shelves, arranging by type, vintage, or preference. Take a final photo of the reassembled display.
The modular design of systems like our Matte Black Modular Wine Rack Display Kit lets you reconfigure during reassembly, add shelves in new positions, adjust spacing, or expand the footprint.
Common Mistakes to Avoid When Relocating Your Rack
Even careful planning can go wrong if you skip these steps.
Mistake 1: Moving bottles without protection. Loose bottles roll and collide.
Mistake 2: Forgetting to label components. Without labels, reassembly becomes a puzzle that wastes hours. Label shelves, supports, fasteners, and connector sets.
Mistake 3: Skipping the photographic record. Photos show exactly how connectors align, fasteners attach, and shelves sit.
Mistake 4: Ignoring wall differences. Different walls require different anchors. Check your new wall material before reassembly and use appropriate fasteners.
Mistake 5: Exposing wine to temperature swings. Keep your collection in a stable environment and avoid leaving bottles in a hot vehicle or cold garage.
Mistake 6: Over-tightening fasteners. Over-tightening strips threads, cracks connectors, and can damage the finish. Firm hand-tight is sufficient.
Mistake 7: Reassembling without testing stability. Push on shelves and frame from different angles before loading bottles.
Mistake 8: Rushing the disassembly or reassembly. Rushing leads to forgotten fasteners, misaligned pieces, and damage.
Moving a modular wine rack is entirely doable with the right approach: treat your collection and components with care, stay organized, and take your time.
The result is a wine display perfectly suited to your new space, with every bottle protected and every component secure. When you're ready to invest in a premium modular system that moves with you, explore our collection at VintageView. Shop Now!
Frequently Asked Questions
Can modular wine racks be moved to a different room after installation?
Yes, most modular wine racks can be relocated to a different room. The key is careful disassembly, proper labeling of components, and thorough inspection of the new wall before reinstallation. Ensure the new location can support the weight of your wine collection and that fasteners are appropriate for the surface type. Document your original layout with photos to simplify reassembly.
What's the difference between moving a wall-mounted rack versus a floor-to-ceiling modular wine rack?
Wall-mounted racks require wall inspection and new anchoring hardware at the new location. Floor-to-ceiling systems like the Matte Black Modular Floor-to-Ceiling Wine Rack Kit are freestanding and don't require wall mounting, making them easier to relocate, you simply disassemble the post and backer support system, transport the components, and reassemble them in the new space without wall preparation.
How do I label and organize rack components during a move?
Photograph your entire rack layout before disassembly from multiple angles. Number each module and connector with removable labels or tape, noting which shelves, connectors, and fasteners belong together. Store matching components in separate compartmented boxes with dividers to prevent damage. Keep a detailed inventory list and photos with your packing materials so reassembly is straightforward and you don't lose small fasteners.
Do I need to inspect the new wall before reinstalling a modular wine rack?
Absolutely. Check the new wall for structural integrity, moisture, and stability before reinstalling. Verify that the wall can support the weight of your wine collection, this is critical for valuable bottles. Test placement points with a stud finder if needed, and ensure the surface is clean and free of damage. If the wall condition differs significantly from your original location, you may need different fasteners or hardware.