
Table of Contents
- Step 1: Planning and Space Assessment for Your Under Stair Wine Rack
- Step 2: Structural Reinforcement and Framing
- Step 3: Insulation, Vapor Barrier, and Climate Control
- Step 4: Selecting Modular Wine Storage Systems and Racking Layout
- Step 5: Essential Tools for Wine Rack Assembly
- Step 6: Installation, Lighting, and Finishing Touches
- Common Mistakes to Avoid
- Frequently Asked Questions
Last Updated: September 16, 2026
Step 1: Planning and Space Assessment for Your Under Stair Wine Rack
An under stair wine rack works best when planning starts before any material is cut. Sloping headroom and a triangular footprint make the space valuable and difficult at once.
 2024 10 10 09.45.56
Measure three things first: clear height at the tallest point, depth from the back wall to the stringer face, and width at both the narrow and wide ends. Write them down, most failed projects skip this and discover the problem after the first rack arrives.
Calculating Bottle Capacity and Layout
Bottle capacity follows from your measurements. A standard 750ml bottle needs roughly 90mm of width in a single-depth rack and about 300mm of depth stored label-forward.
Step 2: Structural Reinforcement and Framing
Framing is where an under stair wine rack becomes part of the building. The staircase above is already carrying load, so the goal is an independent load path: none of the rack's weight, or the wine's, should transfer into the stair structure.
Reading the Load Path Before You Cut Anything
Every under-stair rack has three possible load paths, and you should choose one deliberately:
- Floor-to-stringer frame, vertical uprights rise from the floor to the underside of the stringer, with horizontal rails spanning between them. Load goes straight down to the floor. Safest when the floor below is slab or well-supported joists.
- Wall-blocking frame, horizontal blocking fixed between wall studs at every rack fixing height, with the rack cantilevering off the wall. Only works if the wall is structural or verified as capable of carrying the added load.
- Hybrid frame, uprights carry the vertical load to the floor while wall blocking resists tipping and lateral movement. Most common in real installations because it combines a clean load path with rack stability.
Step-by-Step Framing Around Existing Stringers
A workable sequence that most builders follow:
- Mark the rack footprint on the floor and wall using your Step 1 measurements, and snap chalk lines so the frame stays true.
- Locate studs with an edge-detecting finder and mark both edges of each stud. Spacing is typically 400mm or 600mm on centre, but verify, older homes can be irregular.
- Install horizontal blocking between studs at every rack fixing height. Use timber of at least 45mm x 90mm, fixed with lag bolts through the studs, not screws into plasterboard alone.
- Cut and fit vertical uprights from floor to the underside of the stringer, leaving a 3-5mm gap at the top so the upright does not lift the stringer if the floor settles. Shim or use an adjustable foot if the floor is uneven.
- Fix horizontal rails across the uprights at 400mm centres, level in both directions, the rack columns bolt to these.
- Cross-brace diagonally at the back if the span exceeds roughly 900mm, which stops the frame racking sideways under uneven load.
- Check for level and plumb before fixing the rack. A frame 3mm out at the first upright will be visibly crooked by the fifth column.
Building Codes and Fire Safety
Check local building codes before you enclose anything. Many jurisdictions treat a permanent under-stair structure as a modification subject to fire and egress rules, especially near a doorway or escape route. Common requirements include fire-rated enclosure materials, minimum egress width, and access to meters or shut-off valves. If the staircase is the only route between floors, extra requirements may apply, confirm with your local authority before framing.
Step 3: Insulation, Vapor Barrier, and Climate Control
Wine ages best at a stable 12-14°C with humidity between 50% and 70%. Under-stair spaces are usually the worst place in a house for both, sitting against external walls and picking up heat from the rooms above. Getting this step right separates a rack that preserves wine from one that slowly cooks it.
Vapor Barrier and Insulation Order
The vapor barrier goes on the warm side of the insulation, in a heated home, the interior face. Insulate the walls and the underside of the stairs, then seal every gap with acoustic sealant, including service penetrations. Continuity matters more than thickness: one unsealed cable penetration can let more moisture through than the rest of the wall combined.
- Walls: R-13 to R-20, depending on climate zone
- Ceiling (underside of stairs): R-20 or higher, because heat rises from the room above
- Floor: R-10 if the floor is over a crawlspace or unheated area
Sizing Your Cooling Unit, The BTU Math
This is the part most guides skip. Cooling unit sizing is not guesswork; it follows a simple heat-load calculation.
Ventilation and Heat Rejection
Ventilation matters as much as cooling. Plan an exhaust path to an adjacent room or outside before closing up the framing, a blocked or undersized exhaust is the most common reason a correctly sized unit still fails to hold temperature.
| Factor | What to Check | Why It Matters |
|---|---|---|
| Cabinet volume | Length × width × height in cubic metres | Base input for the BTU calculation |
| Insulation R-value | Walls, ceiling, floor | Poor insulation can double the heat load |
| Adjacent heat sources | Kitchens, utility rooms, ductwork, chimneys | Adds 30-50% to the base load |
| Exhaust route | Path for rejected heat | Blocked exhaust kills thermal efficiency |
| Door seal | Gasket condition and fit | Leaks make setpoint unreachable |
| Vapor barrier | Continuity at penetrations | Gaps cause condensation and mould |
Monitoring Temperature, Humidity, and Vibration
Once running, monitor the cabinet. A digital thermo-hygrometer at bottle height, not on the floor or ceiling, shows whether the unit holds setpoint. Log readings for the first month to see how the space behaves through weather changes.
Winerack Wall Serie W11 - Depth 1 bottle →
Step 4: Selecting Modular Wine Storage Systems and Racking Layout
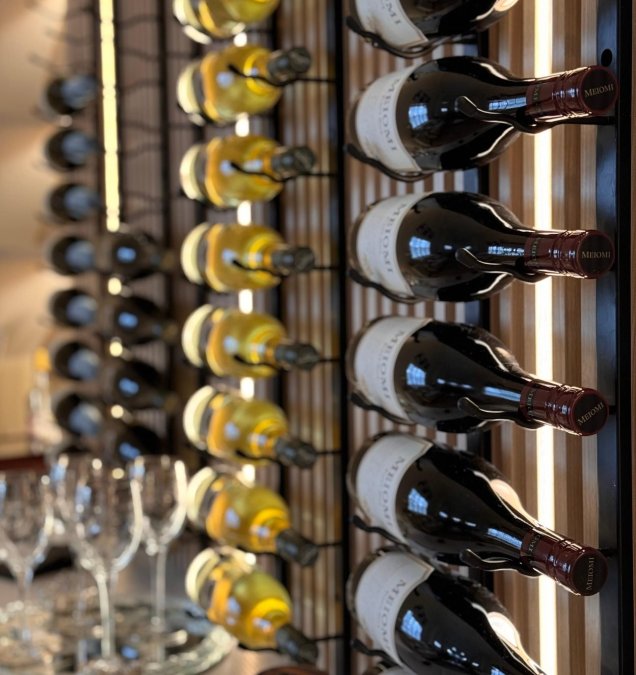
Modular wine storage systems solve the problem fixed joinery creates: you cannot change it when your collection grows. Start with one column and add more as bottle count rises.
Step 5: Essential Tools for Wine Rack Assembly
The essential tools for wine rack assembly are fewer than most people expect, but a few decide whether the job goes smoothly.
You will need:
- A stud finder that detects both edges of a stud, not just the centre
- A spirit level at least 600mm long
- A drill with masonry and timber bits
- A socket set for lag bolts
- A tape measure and pencil
- A mitre saw if you are cutting rails or trim
- Safety glasses and a dust mask
Step 6: Installation, Lighting, and Finishing Touches
Install bottom-up, column by column. Fix the first column, check it for level in both directions, then use it as the reference for every column after it.
Minimalist Wine Display Ideas for Small Kitchens
Minimalist wine display ideas for small kitchens come down to three moves: use vertical space, keep the frame slim, and let the bottles be the decoration.
Common Mistakes to Avoid
The most common mistake is loading the rack before the fixing has been checked under load. Test each column with weight before filling it.
Other frequent errors:
- Skipping the vapor barrier, which leads to mould behind the rack within a season
- Sizing the cooling unit by guesswork instead of by volume
- Fixing into plasterboard rather than into blocking or studs
- Ignoring building codes for enclosed under-stair structures
- Choosing a fixed rack when a modular system would have cost the same and grown with the collection
Frequently Asked Questions
How much does it cost to build a wine cellar under stairs?
Costs vary widely based on materials and cooling. A basic project using plywood and a small cooling unit might start around €2,000. A premium build with custom millwork, a glass partition, and high-end modular wine storage systems can exceed €10,000. The main cost drivers are the cooling unit, insulation, and your chosen racking system. For a quality display, expect to invest in proper climate control.
What are the best materials for a modern under-stair wine rack?
For a modern look, steel or aluminum modular wine storage systems are excellent. They offer strength and a sleek finish. For the enclosure, moisture-resistant plywood and rigid foam insulation are essential. A glass partition adds a premium feel and helps with temperature regulation. The material choice should balance aesthetics with thermal efficiency.
How do you ensure proper ventilation for under-stair wine storage?
Proper ventilation is critical. A self-contained cooling unit needs space to exhaust heat. If your under-stair area is fully enclosed, you must vent the unit to an adjacent room or outside. Install a vent with a fan to pull hot air away from the compressor. Without adequate airflow, the unit works harder, reducing its lifespan and failing to maintain stable wine storage temperature and humidity requirements.
Can you store wine under the stairs?
Yes, you can store wine under stairs, provided you manage temperature, humidity, and vibration. Stairs are often in the center of a home, which can help buffer temperature swings. However, you must insulate the space and install a cooling unit if the ambient temperature fluctuates. The area also needs to be sealed against dust and light. With the right preparation, it can become an ideal wine storage spot.